Here is a video tutorial on how to create an inbound. For more background, please read the below article.
In this section, you can add and track your inbound shipments to Shipfusion. To get started, select Inventory > Inbounds from the menu:

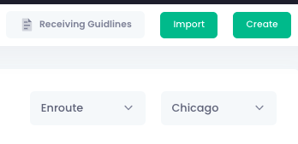
In the top right corner, you can select either the Import or Create buttons, as well as view the Receiving Guidelines. You can also filter your inbounds by warehouse and status:

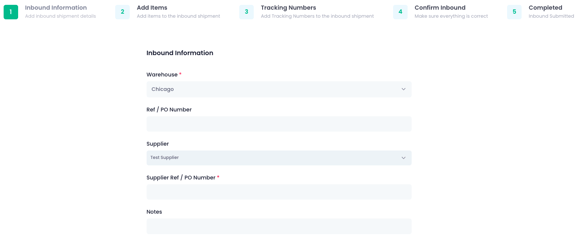
When selecting the Create button, a popup will appear, giving you a step-by-step for your inbound. In the first step, make sure to select the appropriate warehouse that your inbound is being received at, the reference or PO number, supplier, and any notes.

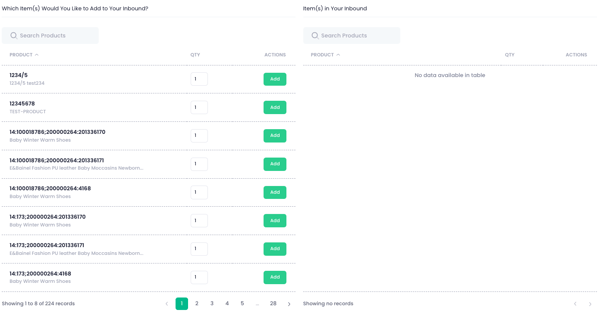
Second, you will want to enter the items contained in the inbound by selecting your SKUs and entering the quantities on the right:

For the third step, you can add your tracking numbers:

Lastly, on the fourth step, you need to confirm the previously input information, and then complete your inbound by selecting the Submit button.
To view an inbound, select the View button next to the corresponding inbound shipment. If you wish to pin a specific inbound to your dashboard, select the Pin option:
On the next page, you will be taken to the details of your inbound shipment. On the Details tab, you can see information like the status, total units included, the reference/PO number, and warehouse location:
On the Items tab, you can see all the individual SKUs listed in your inbound shipment, including how many items were accepted or rejected once it arrived:
Within the Summary tab on the bottom of the page, you can select the Lot Details button to view more information regarding the lot details for a specific SKU:
The Tracking tab will show you a list of all tracking numbers you’ve input in relation to the inbound. If you need to add them, you can do so from the Add Tracking Number button on the right:
The Attachments link within the “Additional Information” section will allow you to add any documentation or attachments for the inbound shipment: